Keycloak Single Sign-On
Keycloak is an open-source identity and access management solution that
supports OpenID Connect, SAML 2.0, and OAuth 2.0. You can also use Keycloak to connect to existing
user directories such as LDAP and Active Directory.
Single Sign-On allows you to manage users using OIDC providers. After logging in, such users are
automatically added to a team and can access team projects. When users are removed from Keycloak,
they automatically lose granted access in Uptrace.
Step 1. Create OIDC SSO in Uptrace
- In Uptrace, go to Organization -> Single Sign-On
- Click New SSO -> New OIDC
- Fill out the form:
- Domain: your unique domain name (can be any string; it will be used later during the sign-in
process) - User team: select the team that will be automatically assigned to new users
- User role: select the role that will be automatically assigned to new users
- Domain: your unique domain name (can be any string; it will be used later during the sign-in
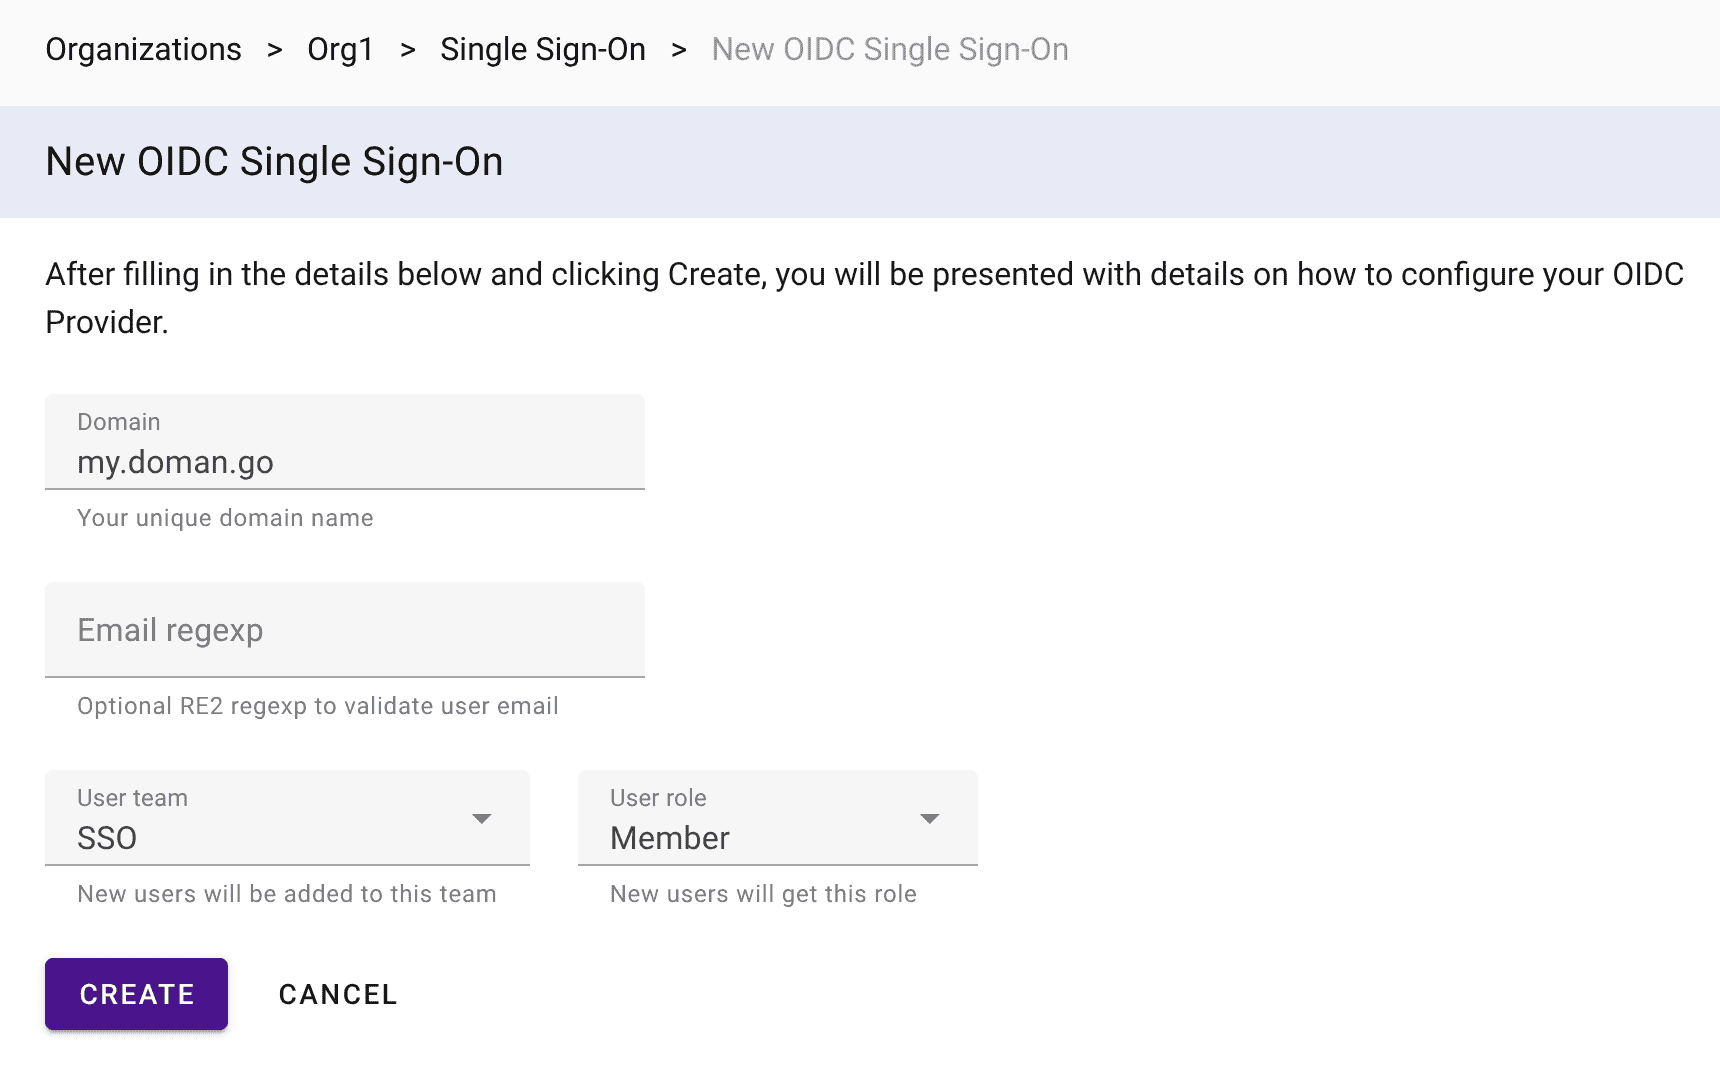
- Click Create and you will be presented with a redirect URL to configure Keycloak
Leave this form open — you will need to enter the Client ID and Client Secret from Keycloak
to finish the setup.
Step 2. Run Keycloak
Start Keycloak in development mode using Docker:
docker run --name keycloak --rm -p 8080:8080 \
  -e KEYCLOAK_ADMIN=admin \
  -e KEYCLOAK_ADMIN_PASSWORD=admin \
  quay.io/keycloak/keycloak:26 start-dev
The start-dev command runs Keycloak in development mode without HTTPS. For production deployments, see the Keycloak Server Installation Guide to configure TLS and a database.
Step 3. Log in to Keycloak admin console
- Open http://localhost:8080
- Click Administration Console
- Log in with
admin/admin
Step 4. Create a realm
Keycloak uses realms to manage sets of users and credentials. Create a new realm named uptrace:
- In the top-left dropdown (which shows "master"), click Create realm
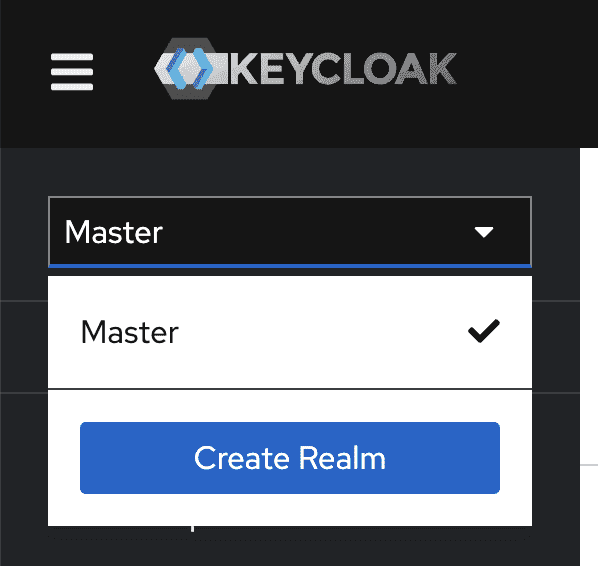
- Set the Realm name to
uptrace - Click Create
The realm name is part of the OIDC issuer URL (/realms/<realm-name>), so remember what you chose.
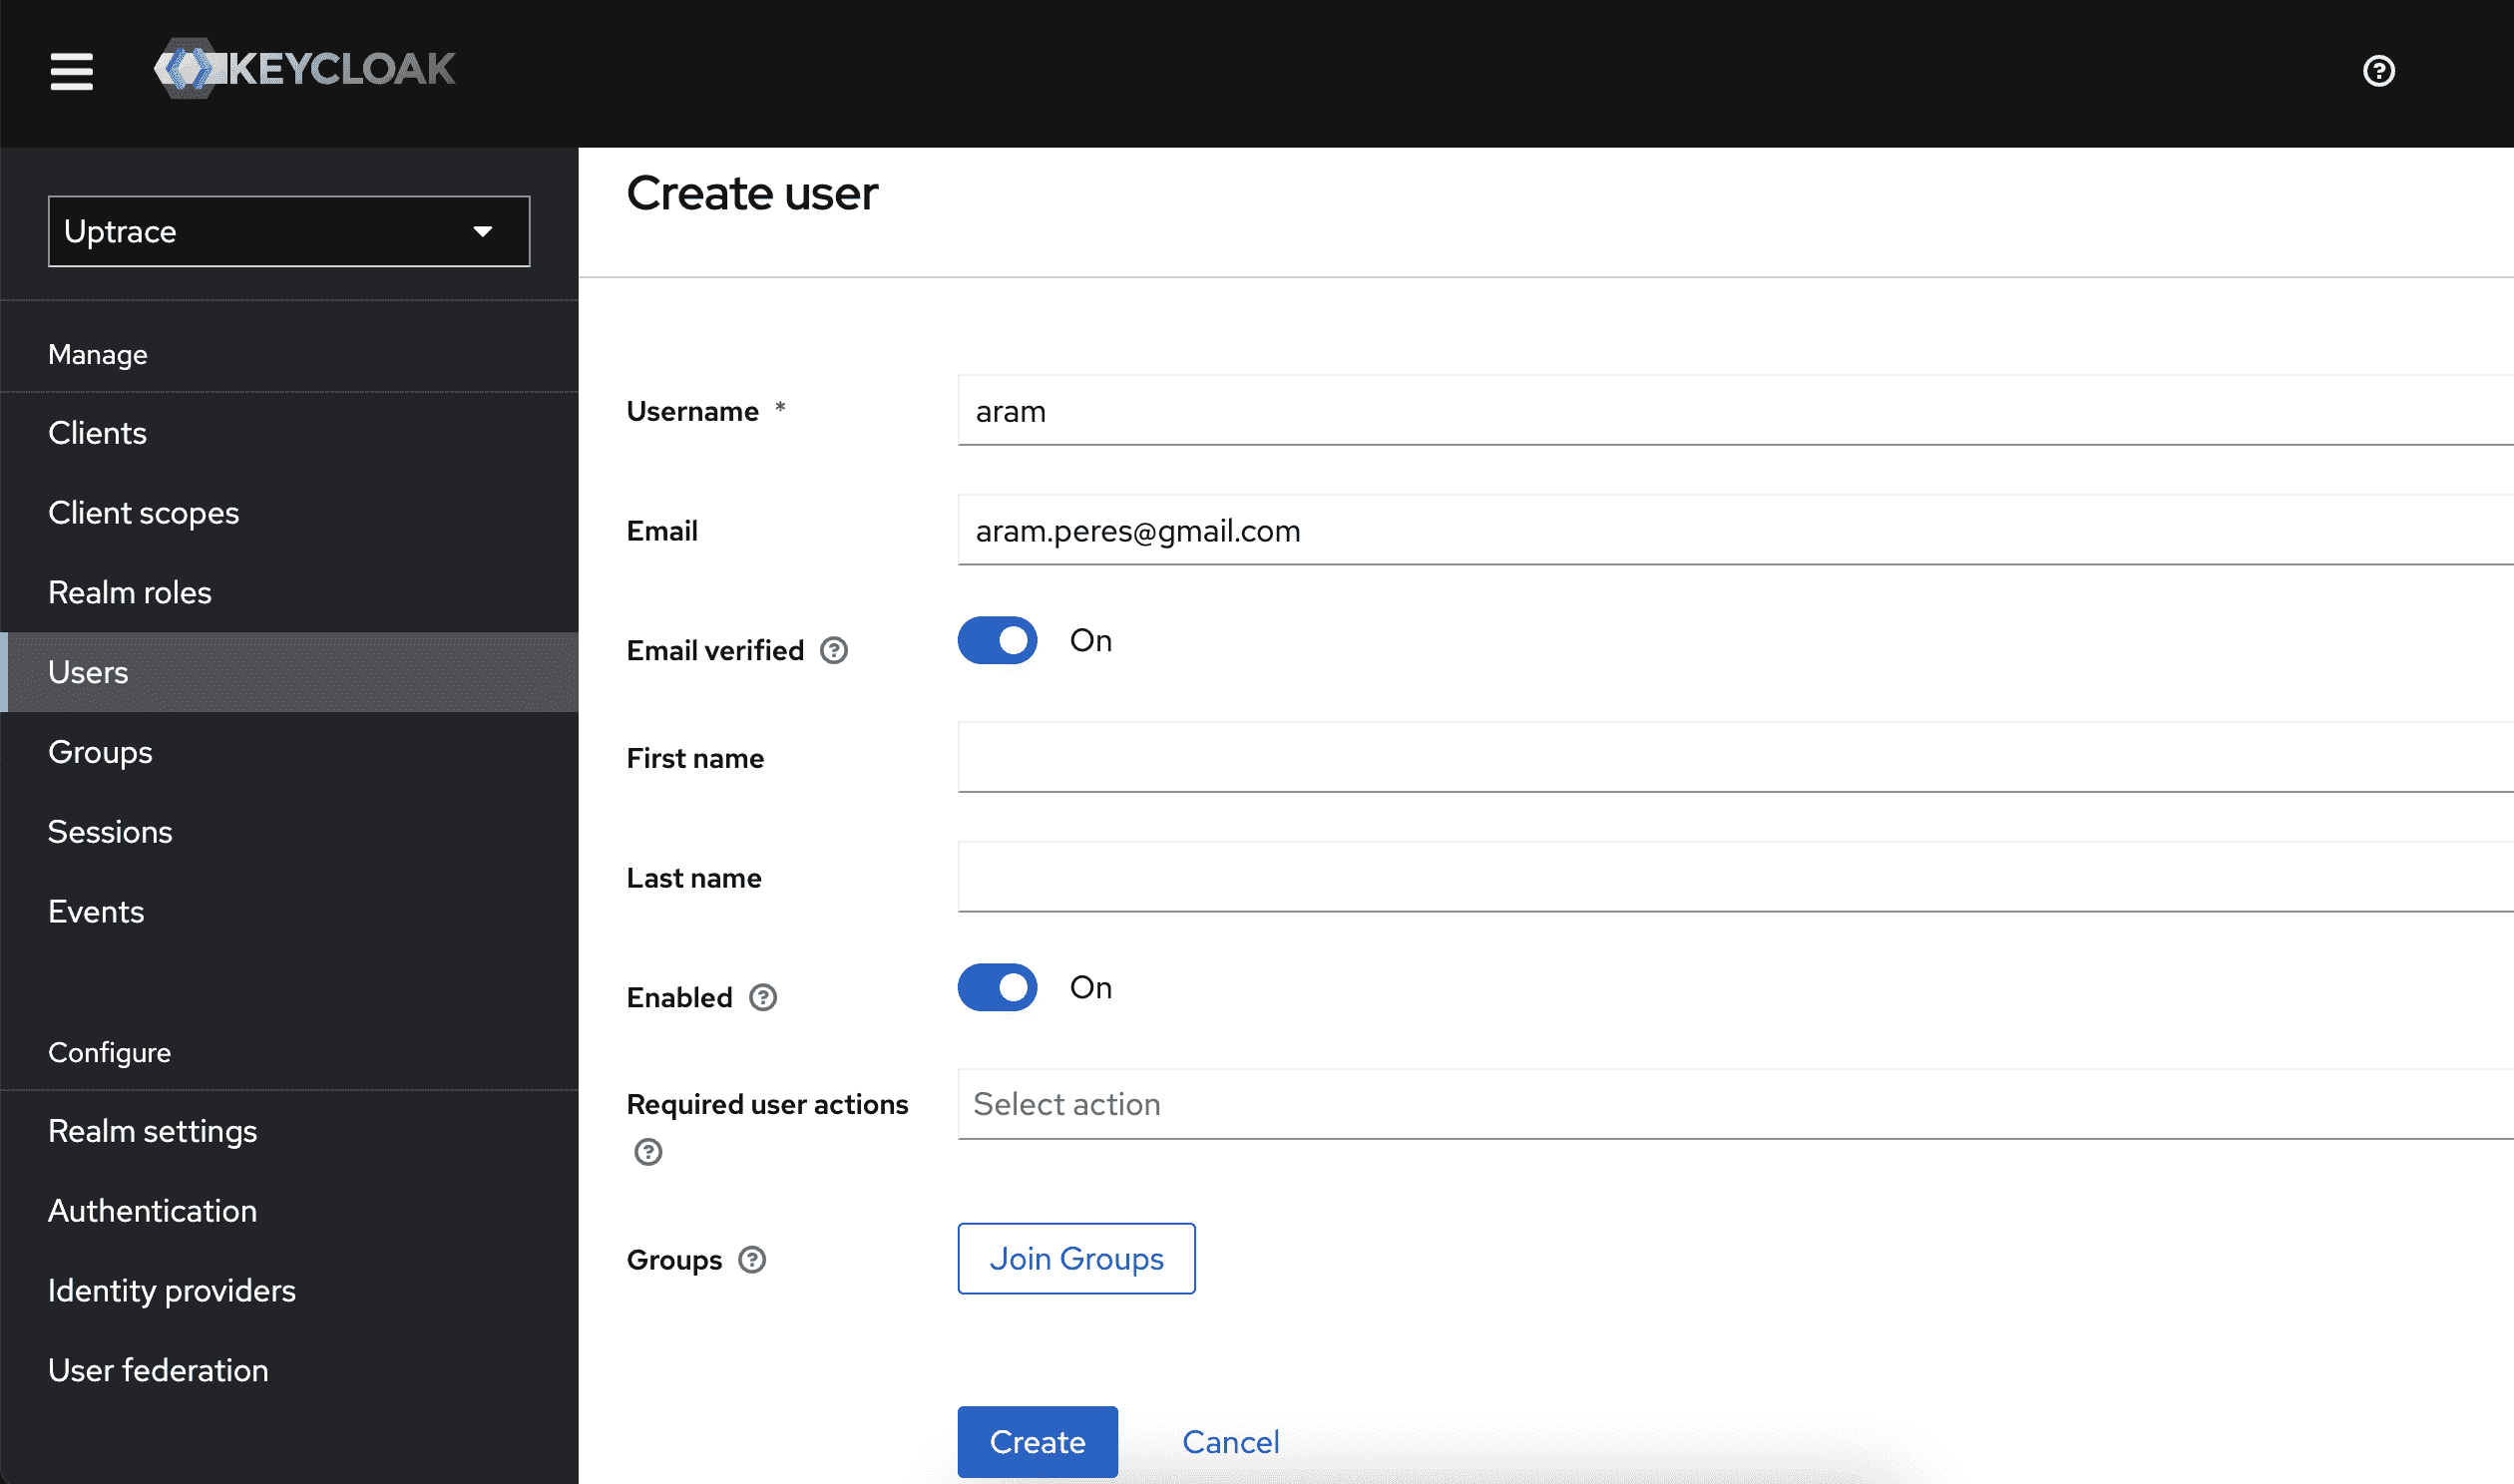
Step 5. Create a user
- Go to Users in the left sidebar and click Create new user
- Fill in the Username and Email fields (email is required for Uptrace)
- Click Create
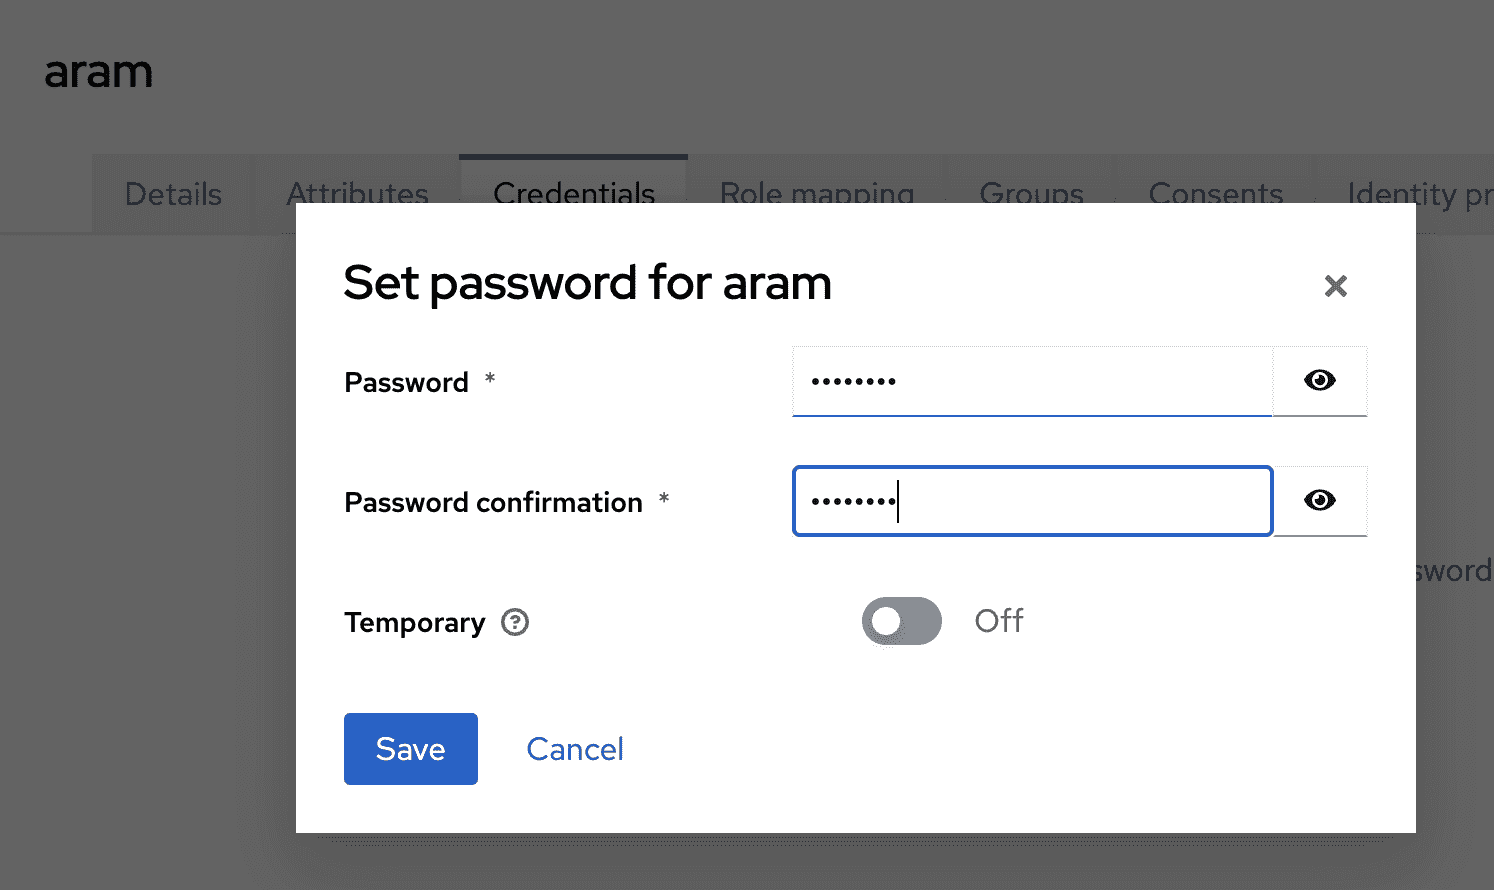
- Go to the Credentials tab and click Set password
- Enter a password and set Temporary to OFF
- Click Save
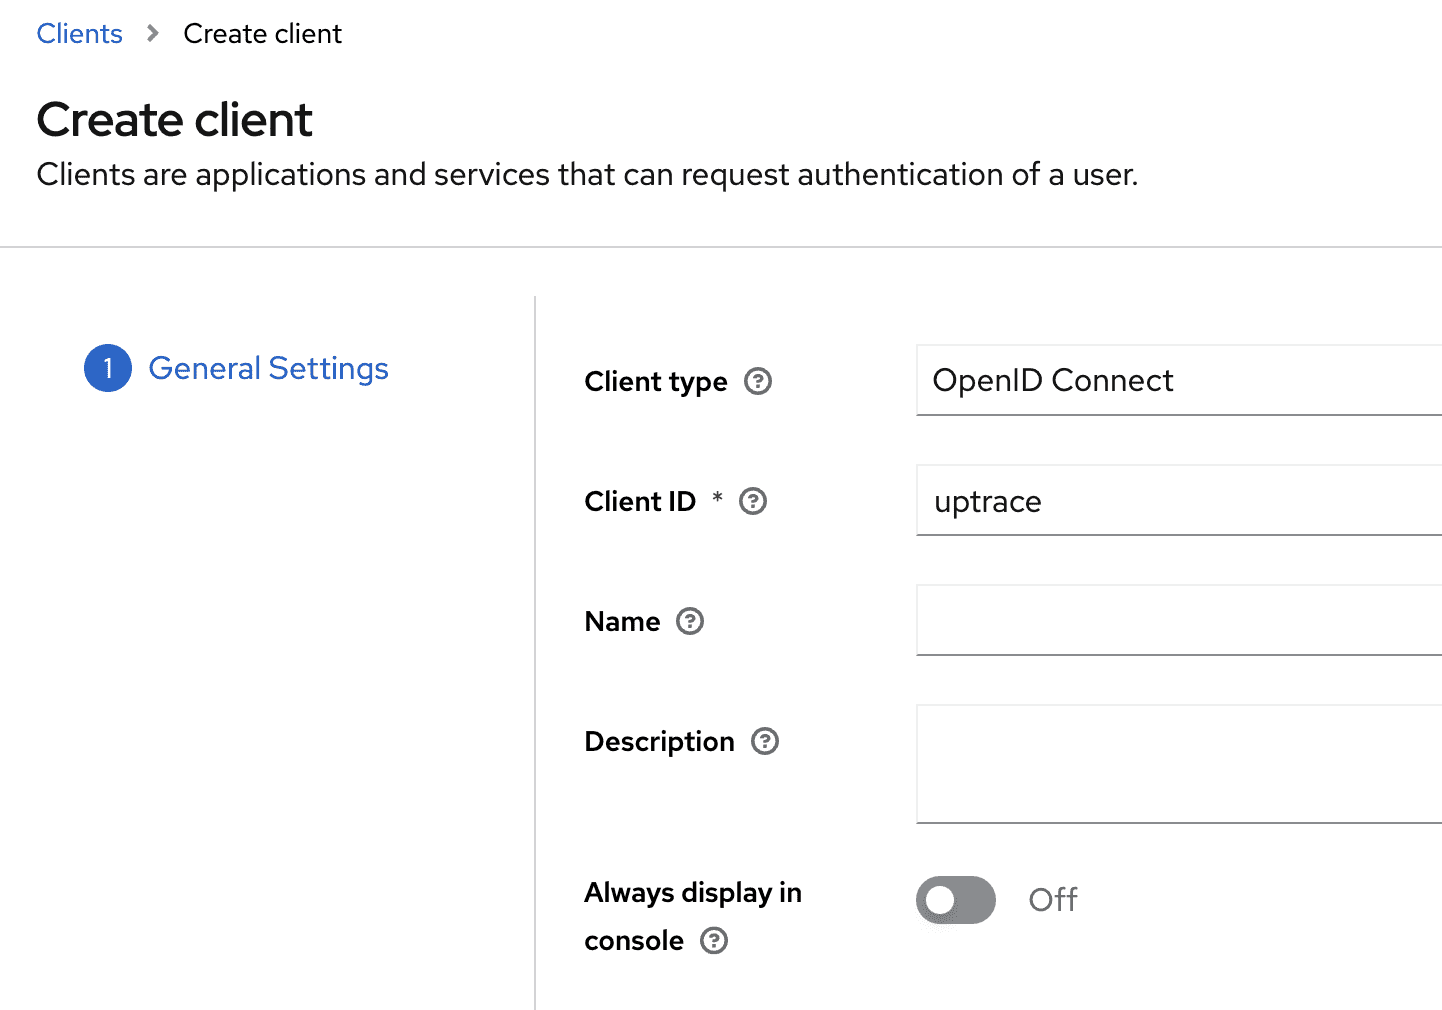
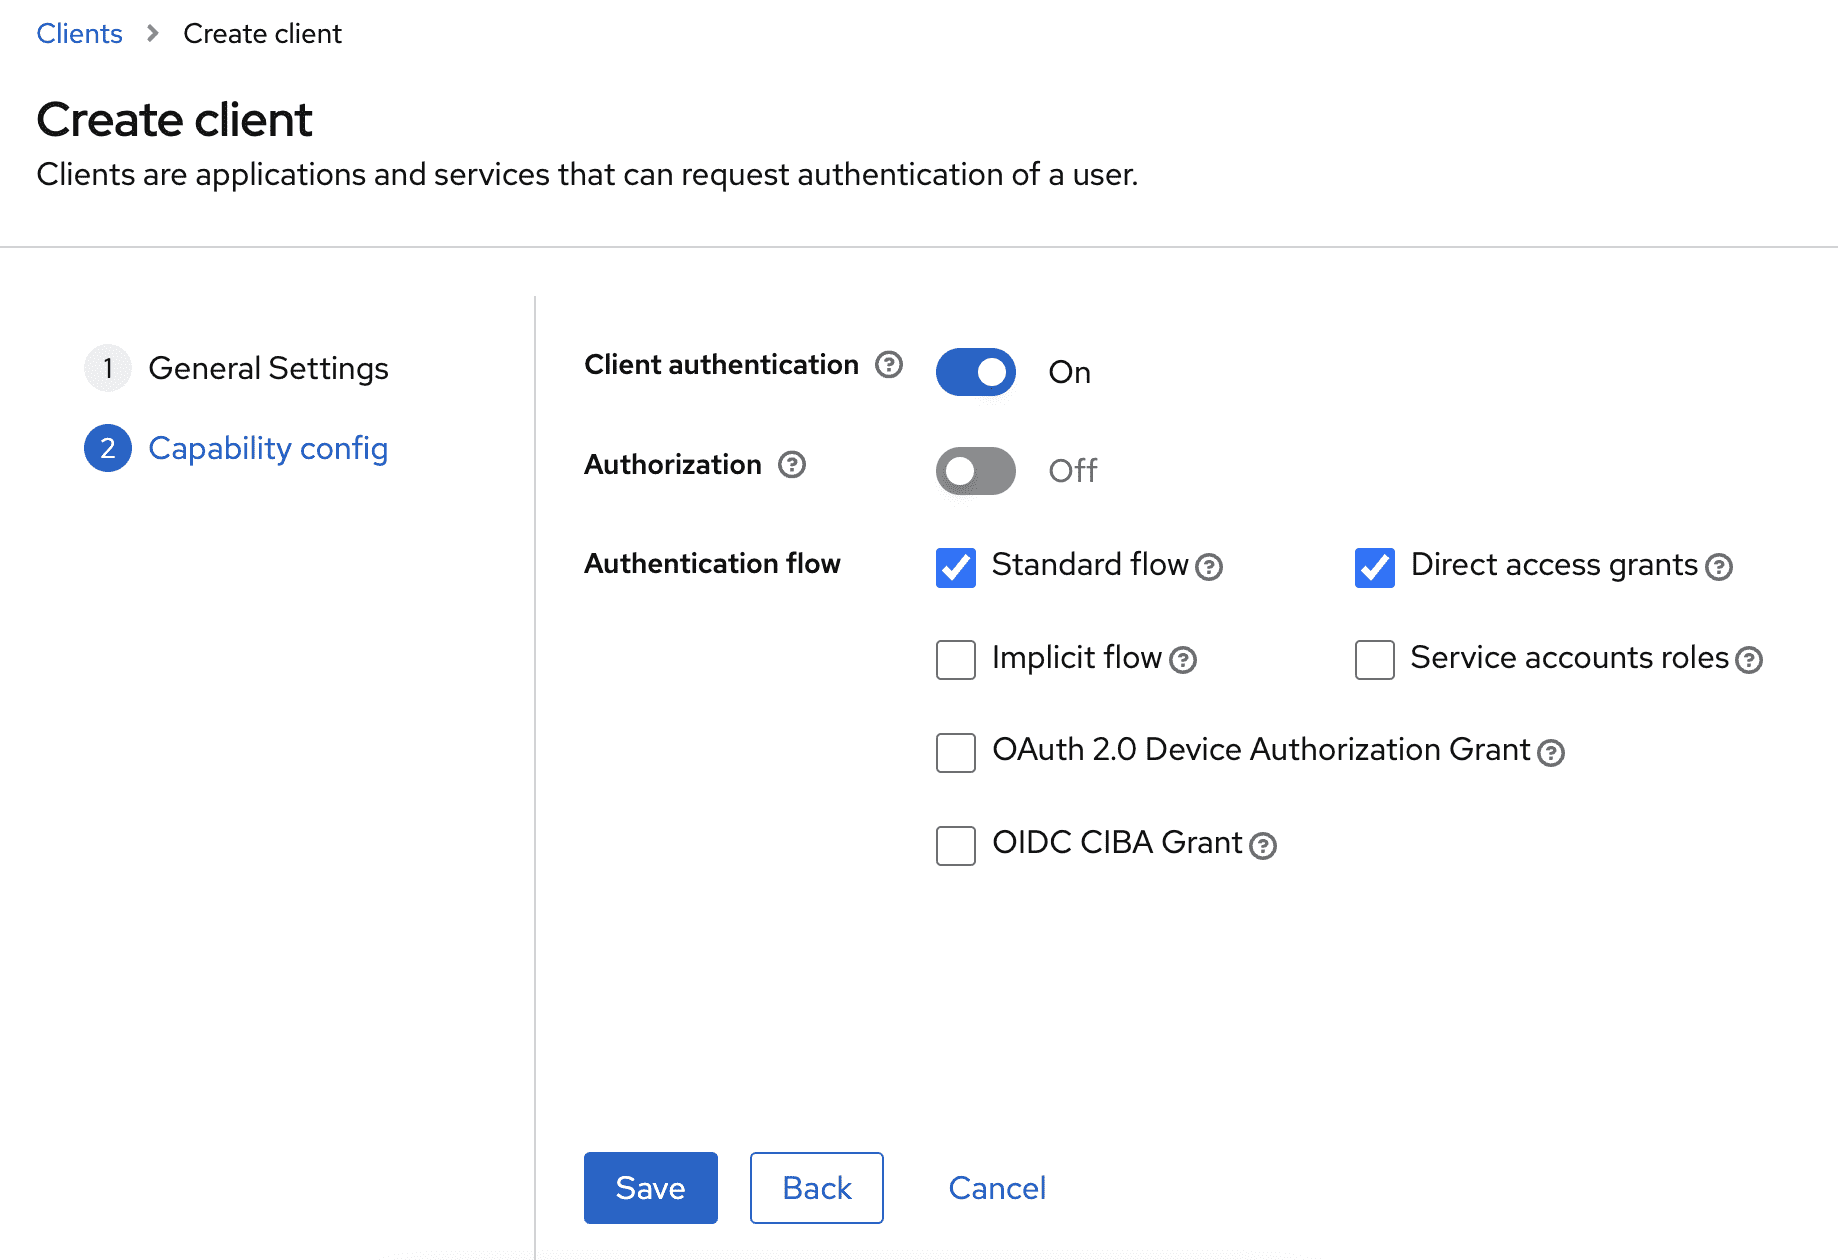
Step 6. Create a client for Uptrace
- Go to Clients in the left sidebar and click Create client
- Set Client ID to
uptrace(or any name you prefer) - Make sure Client authentication is turned ON (this enables confidential access with a
client secret) - Click Save
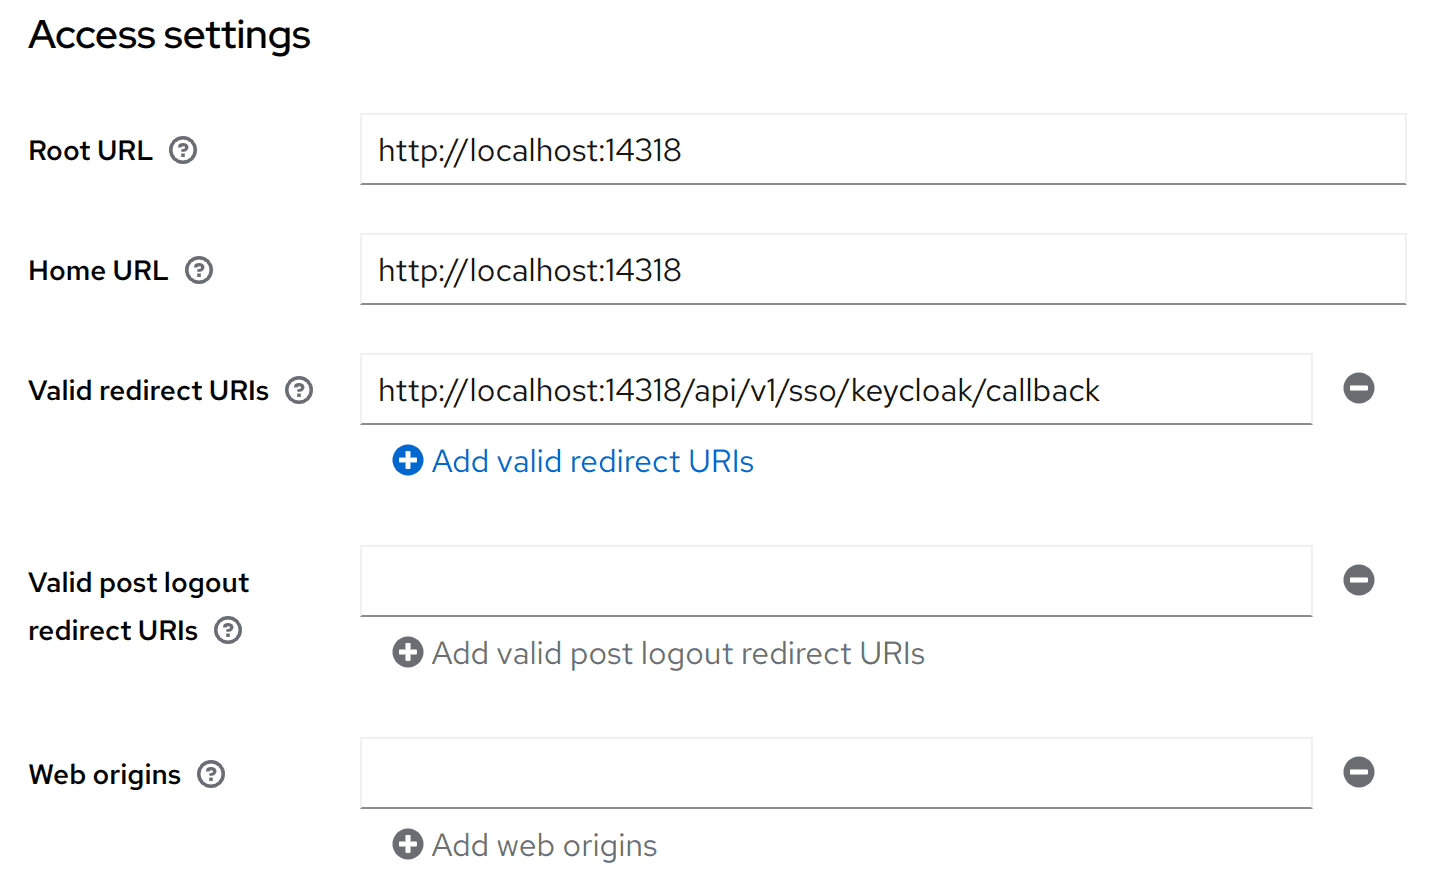
Step 7. Configure redirect URI
- In the client settings, go to the Settings tab (or Access settings section)
- Set Valid redirect URIs to the redirect URL you received from Uptrace in Step 1
- Click Save
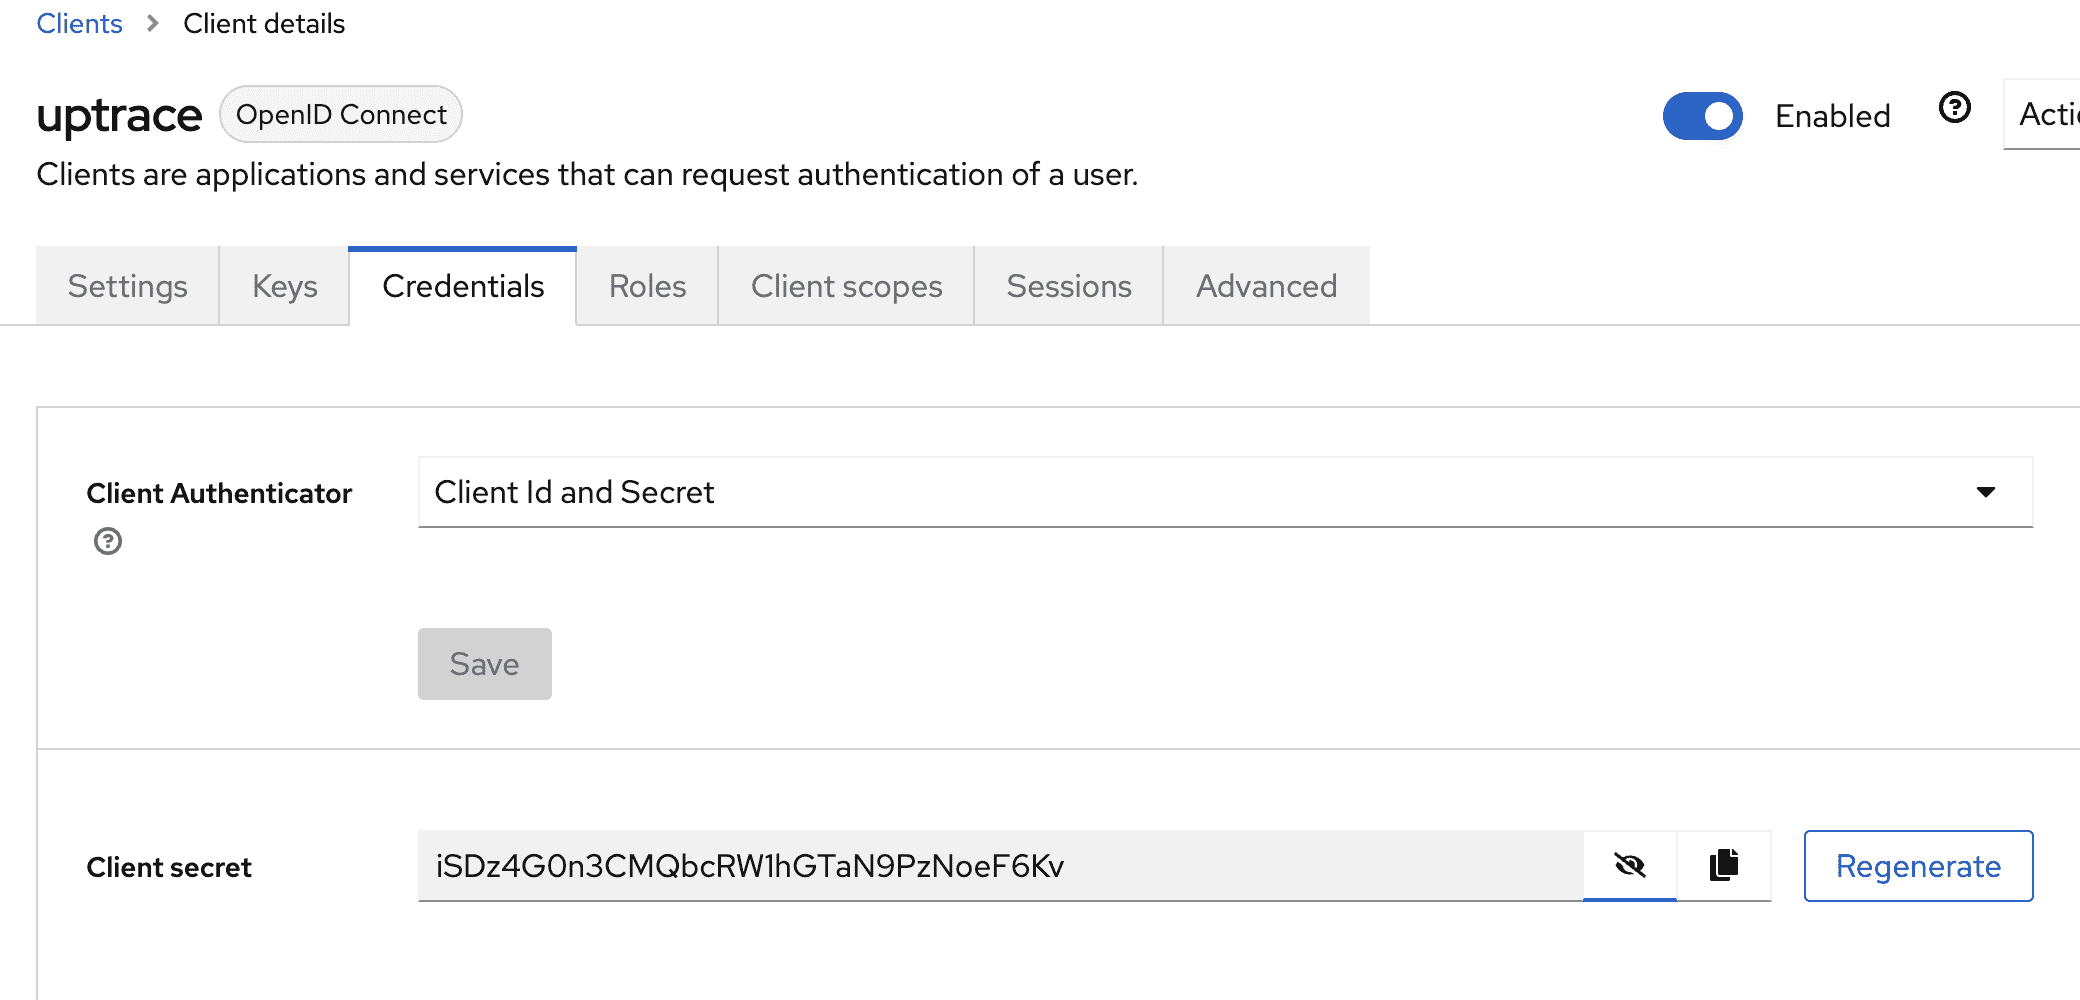
Step 8. Get client credentials
- In the client settings, go to the Credentials tab
- Copy the Client secret — you will need it for the Uptrace configuration
Step 9. Finish configuring Uptrace
- Go back to the OIDC SSO form you left open in Step 1
- Enter the Client ID (
uptrace) and the Client Secret you copied in Step 8 - Set the Issuer URL to
http://<keycloak-host>/realms/<realm-name>(e.g.,http://localhost:8080/realms/uptrace) - Click Save
The issuer URL must be accessible from the Uptrace host so that Uptrace can perform OIDC Discovery by fetching <issuer_url>/.well-known/openid-configuration. If Keycloak and Uptrace run on different machines or in separate Docker networks, make sure the URL is reachable.
You can now log in to Uptrace using Keycloak by openinghttps://uptrace.dev/auth/sso/<your-domain>.
Troubleshooting
"issuer did not match" error — Ensure the issuer_url in the Uptrace config exactly matches
the realm URL, including the protocol and port. For example, http://localhost:8080/realms/uptrace
will not match http://keycloak:8080/realms/uptrace if Uptrace accesses Keycloak via a different
hostname.
Redirect URI mismatch — The redirect URI configured in Keycloak must exactly match what Uptrace
uses: http://uptrace.dev/api/v1/sso/keycloak/callback. Make sure the protocol (http vshttps), host, and port all match.
User has no email — Uptrace requires an email address for SSO users. Make sure the Keycloak user
has an email configured in their profile.