Migrating from New Relic to Uptrace
This guide walks you through migrating from New Relic to Uptrace, an OpenTelemetry-native observability platform. You'll learn how to replace New Relic agents with OpenTelemetry SDKs, configure the OpenTelemetry Collector, and recreate dashboards and alerts.
In short: replace New Relic SDK calls with OpenTelemetry instrumentation, deploy the OpenTelemetry Collector to forward telemetry, point it at your Uptrace DSN, then run both systems in parallel to validate data parity before decommissioning New Relic.
Why Migrate from New Relic to Uptrace
Organizations migrate from New Relic to Uptrace for several key reasons:
Cost Efficiency:
- Uptrace processes billions of spans on a single server at 10x lower cost
- No per-host pricing or unpredictable usage-based charges
- Self-hosted option eliminates vendor data egress fees
OpenTelemetry Native:
- Built on open standards - no proprietary agents or lock-in
- Full compatibility with OpenTelemetry SDKs and Collector
- Export data to any backend without re-instrumenting
Unified Observability:
- Traces, metrics, and logs in a single platform
- Automatic correlation between telemetry signals
- Rich dashboards with PromQL-compatible query language
Open Source Flexibility:
- Self-host on your infrastructure or use managed cloud
- Full control over data retention and processing
- Active community and transparent development
What doesn't carry over automatically: New Relic's Applied Intelligence (anomaly detection), CodeStream, and Synthetics/Browser RUM are proprietary features with no direct OpenTelemetry equivalent. Plan for these separately — see the notes on synthetics and Browser monitoring in the FAQ below before committing to a migration date.
Migrating from Datadog instead? See the Datadog migration guide — the infrastructure and instrumentation steps are nearly identical, only the vendor-specific SDK calls differ.
Inventory Existing New Relic Resources
First, create an inventory of your current New Relic implementation:
- APM Services: List all applications monitored by New Relic APM
- Custom Instrumentation: Identify any manually added instrumentation
- Infrastructure Monitoring: Document hosts, containers, and cloud integrations
- Logs & Metrics: Catalog important logs, custom metrics, and alerting rules
- Dashboards & NRQL Queries: Note any NRQL-based queries you need to migrate
- Alerts & Notifications: Document alert conditions and notification channels
You can use the New Relic API to extract this information programmatically:
# Export all dashboards
curl -X GET 'https://api.newrelic.com/v2/dashboards.json' \
  -H "Api-Key:${NEWRELIC_API_KEY}" > dashboards.json

# Export alert policies
curl -X GET 'https://api.newrelic.com/v2/alerts_policies.json' \
  -H "Api-Key:${NEWRELIC_API_KEY}" > alert_policies.json

# List APM applications
curl -X GET 'https://api.newrelic.com/v2/applications.json' \
  -H "Api-Key:${NEWRELIC_API_KEY}" > applications.json
Infrastructure Setup
Setting up the underlying infrastructure is the first step in your migration journey.
Configure Uptrace Environment
Start by setting up Uptrace using either the cloud or self-hosted option:
- Cloud-Hosted Option: Sign up for Uptrace Cloud
- Self-Hosted Option: Install Uptrace on your infrastructure
Once set up, obtain your project DSN from the project settings page. You'll need this DSN to connect your services to Uptrace.
Deploy OpenTelemetry Collector
The OpenTelemetry Collector is the central component that will replace your New Relic agents. It collects telemetry data from various sources and forwards it to Uptrace.
Basic OpenTelemetry Collector configuration:
receivers:
  otlp:
    protocols:
      grpc:
      http:

processors:
  batch:

exporters:
  otlp:
    endpoint: 'https://api.uptrace.dev:4317'
    headers:
      uptrace-dsn: 'https://<secret>@api.uptrace.dev?grpc=4317'

service:
  pipelines:
    metrics:
      receivers: [otlp]
      processors: [batch]
      exporters: [otlp]
    traces:
      receivers: [otlp]
      processors: [batch]
      exporters: [otlp]
    logs:
      receivers: [otlp]
      processors: [batch]
      exporters: [otlp]
Install the OpenTelemetry Collector on all hosts currently running the New Relic agent to ensure comprehensive coverage.
Configure Data Collection Strategies
Depending on your infrastructure, set up appropriate receivers in the OpenTelemetry Collector:
Host Metrics Collection
For system metrics previously collected by New Relic Infrastructure:
receivers:
  hostmetrics:
    collection_interval: 30s
    scrapers:
      cpu:
      memory:
      disk:
      filesystem:
      network:
      load:
      paging:
      process:
Application Metrics Collection
For applications exposing Prometheus metrics:
receivers:
  prometheus:
    config:
      scrape_configs:
        - job_name: 'my-app'
          scrape_interval: 15s
          static_configs:
            - targets: ['my-app:8080']
Log Collection
For collecting logs from files:
receivers:
  filelog:
    include: [/var/log/*.log]
    start_at: end
    operators:
      - type: json_parser
Application Instrumentation Changes
Updating your application code to use OpenTelemetry is a critical part of the migration process.
Install OpenTelemetry SDKs
First, choose the appropriate SDK for your application's language:
Migrating Tracing Code
Replace New Relic tracing with OpenTelemetry distributed tracing.
Before (New Relic):
import newrelic.agent

@newrelic.agent.background_task()
def process_request(request):
    newrelic.agent.add_custom_attribute('request.id', request.id)
    # process request
After (OpenTelemetry):
from opentelemetry import trace

tracer = trace.get_tracer("my-service")

def process_request(request):
    with tracer.start_as_current_span("process_request") as span:
        span.set_attribute("request.id", request.id)
        # process request
For language-specific tracing guides, see:
Migrating Metrics Code
Update your metric collection code to use OpenTelemetry.
Metric Type Mapping:
| New Relic Type | OpenTelemetry Type | Description |
|---|---|---|
| recordMetric (count) | Counter | Monotonically increasing values |
| recordMetric (gauge) | UpDownCounter | Values that can increase or decrease |
| recordResponseTime | Histogram | Distribution of values |
Before (New Relic):
import newrelic.agent

newrelic.agent.record_custom_metric('Custom/PageViews', 1)
newrelic.agent.record_custom_metric('Custom/ActiveUsers', 123)
After (OpenTelemetry):
from opentelemetry import metrics

meter = metrics.get_meter("my-service")
page_views = meter.create_counter("web.page_views")
users_online = meter.create_up_down_counter("web.users.online")

page_views.add(1)
users_online.add(123)
Implementing Auto-Instrumentation
For many languages, you can use auto-instrumentation to quickly add OpenTelemetry to your applications. Check our guides with instructions for the most popular frameworks.
Updating Logging Code
Implement structured logging with trace correlation. OpenTelemetry automatically injects trace context into your logs, enabling you to correlate logs with traces.
import logging
import json
from opentelemetry import trace

class JsonFormatter(logging.Formatter):
    def format(self, record):
        log_record = {
            "timestamp": self.formatTime(record),
            "level": record.levelname,
            "message": record.getMessage(),
        }

        # Add trace context
        current_span = trace.get_current_span()
        if current_span.is_recording():
            context = current_span.get_span_context()
            log_record["trace_id"] = format(context.trace_id, "032x")
            log_record["span_id"] = format(context.span_id, "016x")

        return json.dumps(log_record)

logger = logging.getLogger("app")
handler = logging.StreamHandler()
handler.setFormatter(JsonFormatter())
logger.addHandler(handler)
For more on logging with Uptrace, see monitoring logs.
Visualization and Alerting
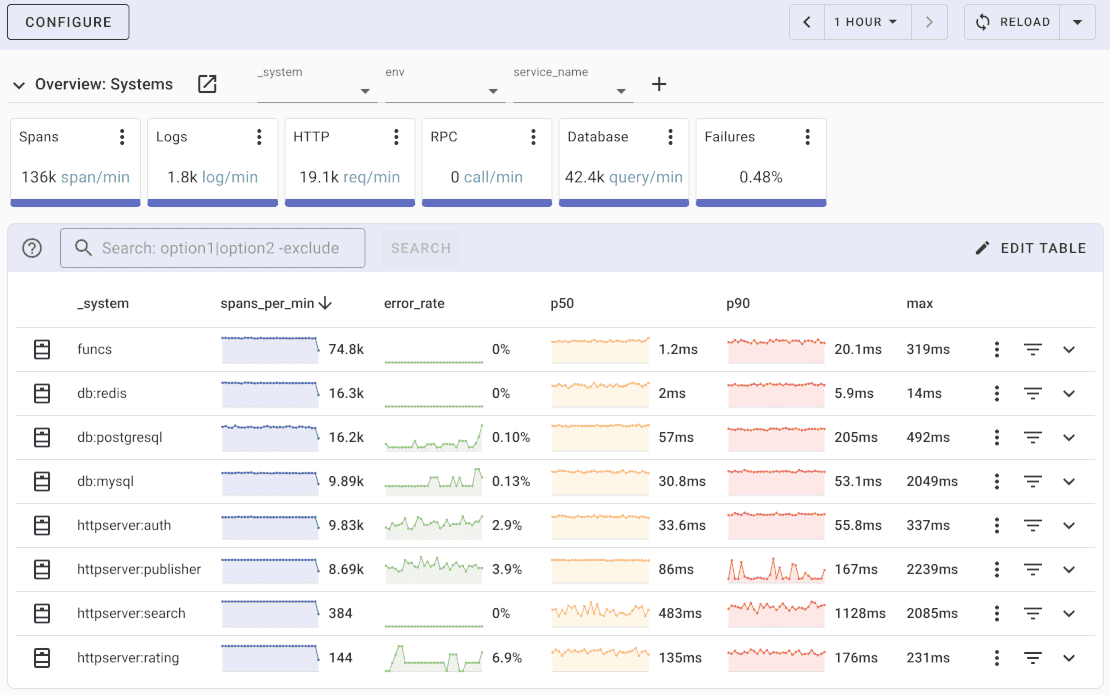
Transferring your dashboards and alerts from New Relic to Uptrace ensures continuity in your monitoring capabilities.
Converting Dashboards
When recreating dashboards in Uptrace:
- Start with critical dashboards first identified in your inventory
- Use Uptrace's prebuilt dashboards where applicable
- Convert NRQL queries to Uptrace's PromQL-compatible syntax
- Validate visualizations match your expectations
Migrating Alerts
To transfer your alerts:
- Extract alert definitions from New Relic
- Create equivalent alerts in Uptrace
- Test alert triggering to ensure proper functionality
- Update notification channels to match your current setup
NRQL to PromQL Translation Guide
When migrating from New Relic to Uptrace, you'll need to translate New Relic Query Language (NRQL) to Prometheus Query Language (PromQL). Here are common translation patterns:
Basic Metrics Queries
| NRQL | PromQL | Description |
|---|---|---|
SELECT average(duration) FROM Transaction | avg(http_request_duration_seconds) | Simple average |
SELECT average(duration) FROM Transaction WHERE appName = 'my-app' | avg(http_request_duration_seconds{app="my-app"}) | Average with filter |
SELECT sum(count) FROM Transaction FACET host | sum(http_requests_total) by (host) | Grouping by attribute |
SELECT count(*) FROM Transaction WHERE httpResponseCode >= 500 | count(http_requests_total{status_code=~"5.."}) | Counting with regex |
Time Aggregation
| NRQL | PromQL | Description |
|---|---|---|
SELECT average(cpuPercent) FROM SystemSample TIMESERIES 1 minute | avg_over_time(system_cpu_percent[1m]) | 1-minute average |
SELECT sum(count) FROM Transaction TIMESERIES 5 minutes | sum_over_time(http_requests_total[5m]) | 5-minute sum |
SELECT max(duration) FROM Transaction SINCE 1 hour ago | max_over_time(http_request_duration_seconds[1h]) | Maximum over 1 hour |
Rate and Throughput Calculations
| NRQL | PromQL | Description |
|---|---|---|
SELECT rate(count(*), 1 second) FROM Transaction | rate(http_requests_total[5m]) | Request rate per second |
SELECT derivative(count, 1 minute) FROM Metric | deriv(metric_name[5m]) | Rate of change |
Percentile Queries
| NRQL | PromQL | Description |
|---|---|---|
SELECT percentile(duration, 95) FROM Transaction | histogram_quantile(0.95, rate(http_request_duration_seconds_bucket[5m])) | 95th percentile |
SELECT percentile(duration, 50, 90, 99) FROM Transaction | Use multiple histogram_quantile() calls | Multiple percentiles |
Naming Conventions
When migrating metrics, follow these naming conversion rules:
- Replace dots with underscores:
- New Relic:
Custom/PageViews - OpenTelemetry:
custom_page_views
- New Relic:
- Add appropriate unit suffixes:
- New Relic:
duration(milliseconds implied) - OpenTelemetry:
http_request_duration_seconds
- New Relic:
- Use standard metric names where possible following OpenTelemetry semantic conventions
Validation and Testing
Before decommissioning New Relic, run both systems in parallel to validate data consistency.
Data Consistency Checks
Verify that metrics in Uptrace match those in New Relic:
- Compare metric values for identical time periods
- Check alert triggering in both systems
- Ensure trace completeness across services
- Validate log collection and correlation
Parallel Running Period
Run New Relic and Uptrace simultaneously for 1-2 weeks:
- Compare dashboards side-by-side
- Verify alerts fire correctly in both systems
- Check that all services are reporting to Uptrace
- Validate data retention and query performance
Once you confirm data parity, gradually migrate teams to Uptrace before disabling New Relic agents.
Decommission New Relic
Once you confirm everything is running smoothly in Uptrace:
- Remove New Relic agents from your applications
- Uninstall New Relic Infrastructure agents from hosts
- Disable log forwarding to New Relic
- Archive your New Relic configuration for reference
- Cancel your New Relic subscription
OpenTelemetry Backend
Uptrace is an open source APM for OpenTelemetry that supports distributed tracing, metrics, and logs. You can use it to monitor applications and troubleshoot issues.
Uptrace comes with an intuitive query builder, rich dashboards, alerting rules with notifications, and integrations for most languages and frameworks.
Uptrace can process billions of spans and metrics on a single server and allows you to monitor your applications at 10x lower cost.
In just a few minutes, you can try Uptrace by visiting the cloud demo (no login required) or running it locally with Docker. The source code is available on GitHub.
FAQ
How long does a typical New Relic migration take?
Migration timeline depends on the complexity of your setup. Simple deployments can migrate in a few days, while complex multi-service architectures may take several weeks for full validation.
Can I run New Relic and Uptrace simultaneously during migration?
Yes, this is the recommended approach. Run both systems in parallel to validate data parity before fully transitioning to Uptrace.
Do I need to change my application code?
Yes, you'll need to replace New Relic SDK calls with OpenTelemetry SDKs. However, many frameworks support auto-instrumentation, reducing code changes significantly.
What about New Relic integrations for cloud services?
Most New Relic integrations have OpenTelemetry equivalents. The OpenTelemetry Collector provides receivers for common services like databases, message queues, and cloud providers.
How do I handle New Relic APM traces during migration?
OpenTelemetry traces are semantically similar to New Relic traces. The main changes are attribute naming conventions and SDK initialization code.
What if I have New Relic Synthetic tests?
Uptrace has its own synthetic monitoring for uptime and endpoint checks. For browser-based or multi-step synthetic tests, you'll still need a dedicated tool like Checkly or Grafana Synthetic Monitoring alongside Uptrace.
Can I migrate New Relic Browser monitoring?
Yes, you can use the OpenTelemetry JavaScript SDK (browser guide) for browser instrumentation. It provides similar real user monitoring (RUM) capabilities, though New Relic's session-replay features have no direct equivalent.
How do I handle exception and error tracking?
Replace the New Relic agent's automatic error capture with OpenTelemetry's exception recording (span.record_exception() / RecordException()). See exception tracking for setup details and how Uptrace groups and surfaces errors.
What's Next?
Your New Relic migration journey continues with these resources:
- Data Ingestion: Explore all ingestion methods including OpenTelemetry SDK, Collector, and Prometheus
- Log Collection: Set up log pipelines with Vector or FluentBit
- Kubernetes: Deploy collectors in Kubernetes environments
- Exception Tracking: Set up error and exception tracking to replace New Relic Errors Inbox
- Synthetic Monitoring: Set up uptime and endpoint checks to replace basic New Relic Synthetics
- Instrumentation Guides: Find framework-specific tutorials in our guides section
- OpenTelemetry: Learn more about OpenTelemetry fundamentals
- Also migrating from Datadog? See the Datadog migration guide